
Downloading and Installing Update
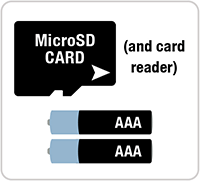

YOU WILL NEED:
- a MicroSD memory card
- a MicroSD card reader connected to your computer
- a card reader capable of accepting MicroSD cards
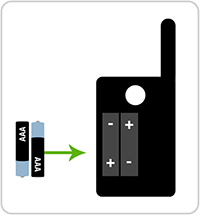
- new batteries for your Cyber Commander™ remoteiii
- two premium AAA alkaline or lithium batteries (do NOT use NiMH batteries)
STEP ONE: Download the firmware
- Click here to download the latest firmware update.
- Save the file “CC_V50.zip” to your hard drive, we recommend to the desktop.
STEP TWO: Copy the firmware to your MicroSD card
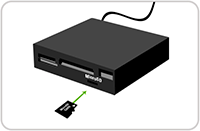
- Insert the MicroSD card into the card reader that is connected to your computer.
- Navigate to the MicroSD card drive, click to open and confirm your MicroSD is empty. If any files or folders are present on the SD card, delete these files and folders prior to proceeding (backup if needed later). Leave this window open.
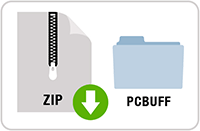
- Navigate to the “CC_V50.zip” file that you saved to your hard drive (desktop) and click to open, unzipping if necessary.
- In the window for the downloaded file, you will see a folder titled “PCBUFF” - click and drag this “PCBUFF” folder to the MicroSD card by dragging the file name/icon into the MicroSD card window.
- Note: Make sure the folder moved to the MicroSD card is named "PCBUFF".
- Eject or safely remove the MicroSD card from the card reader.
You are now ready to update the firmware. Please be aware of the following:
- Downgrading firmware is NOT possible after this update is performed.
- Do NOT attempt to load the firmware more than once or if V50 is otherwise already installed. If you already have version 50 firmware or if you are uncertain as to whether or not the update was successful, do not attempt to update the firmware again - contact us for help.
STEP THREE: Update the firmware on the Cyber Commander™ remote using the MicroSD card
- Remove the batteries from the Cyber Commander™ remote.
- If there is a MicroSD card in your Cyber Commander™ remote, remove this card by pressing in, causing the card to pop out.iv Set this card aside for future use.
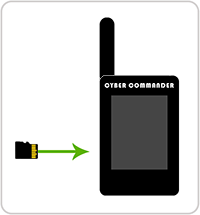
- Take your MicroSD card with the downloaded firmware and insert it into the Cyber Commander™ remote. The MicroSD slot is located on the left side of the unit. Insert the MicroSD card into the slot, metal contacts first, facing up (toward the screen). Push until the card clicks into place.
- Install new batteries in the Cyber Commander™ remote.
- Your firmware update should now start. The Cyber Commander™ screen will go solid white and begin to flicker quickly, alternating between a fast and slow pace. The procedure should take approximately 45 seconds. When completed “Cyber Commander FW Ver 50” will appear at the bottom of the screen, and the unit will return to the “Flash” screen.
- With the update complete, remove the MicroSD card and reinstall the card that was previously in the remote (where you may have saved setups). All saved setups should be intact.v If you wish to use the new card in place of the old card, you may do so, however, any saved setups will not be available on this card. You will either need to manually reenter the setups, or you can use our instructions to transfer the setups from one card to the next. If you opt to manually re-enter your setups, you may want to save an existing setup containing all lights and settings as “Internal1”. You can then use this as your master setup, avoiding having to open from studio and re-specify the lights.
AFTER THE UPDATE HAS BEEN SUCCESSFULLY PERFORMED, you may use either MicroSD cards (up to 2GB in size) or MicroSDHC cards (up to 32GB in size). The Cyber Commander™ unit currently needs less than 20MB for updates and saving setups.
i Only standard-capacity MicroSD cards are supported for this update. AFTER (and only after) the update has been successfully performed can MicroSDHC cards be used. MicroSDXC are not currently supported.
ii Mac Users: Be sure that you do not format to “FAT” on a Mac. The term “FAT” on a Mac is actually FAT32, and will not work to update your unit. The card must be formatted to FAT16 in order to work. If you do need to reformat your card, you can format it in a PC or you may be able to format it in an SD capable camera with the appropriate adapter; however, we cannot guarantee all cameras will format appropriately. AFTER (and only after) the update has been successfully performed can cards formatted on a Mac be used.
iii It is very important that you use NEW batteries when you perform this update. If the batteries die during the update process, the process may fail and cause major problems with the unit, requiring you to send the unit in for service.
iv If you have an issue removing the MicroSD card from the Cyber Commander™ remote, it may be helpful to carefully use a knife tip to gently pry up on the MicroSD card.
v If you have experienced lockup issues with your Cyber Commander™ remote in the past, continue using the new card that you used to update the firmware. If you had setups saved on the previous MicroSD card, you can either manually reenter the setups, or you can use our instructions to transfer the setups from one card to the next.

© PAUL C. BUFF, INC | About Us | Help Center | Privacy Policy | Site Map | Toll Free 1.800.443.5542 | Local 615.383.3982 | Contact Us